Configure NetFlow Monitor using the GUI for your WLC5500
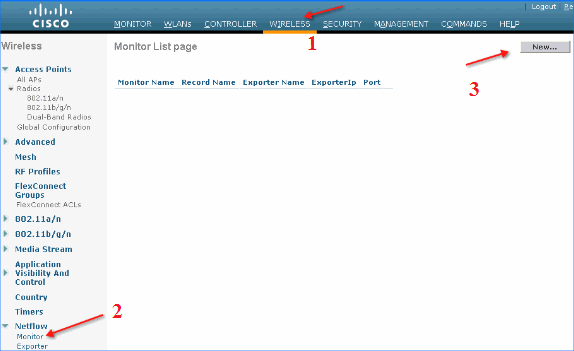
After creating your Exporter, a Monitor is also needs to be created. Please select “Wireless”, then under “NetFlow” please select “Monitor” and then “New”.

Please give the Monitor a name of “LiveNX Monitor” and select “Apply”.

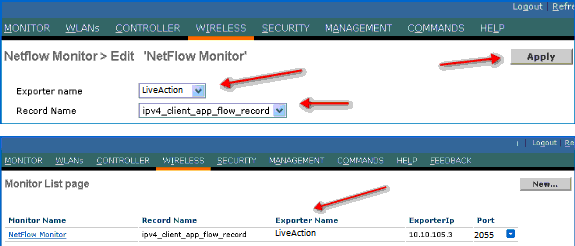
After the monitor has been applied it is necessary to map it to the exporter created earlier. Please click the “LiveNX Monitor”.

From here you need to select the created “LiveNX Exporter” from the dropdown, and then select “ipv4_client_app_flow_record” from the drop down, and the click “Apply”.

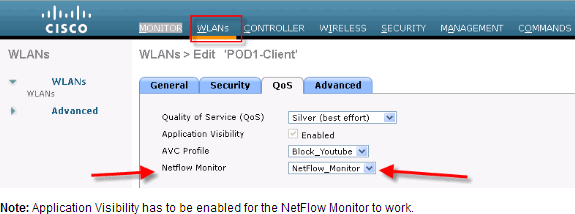
Finally you will need to map the LiveNX NetFlow monitor to the WLAN. To do this please select “WLANs”, then the “QoS” tab and from here you can select the created NetFlow monitor!

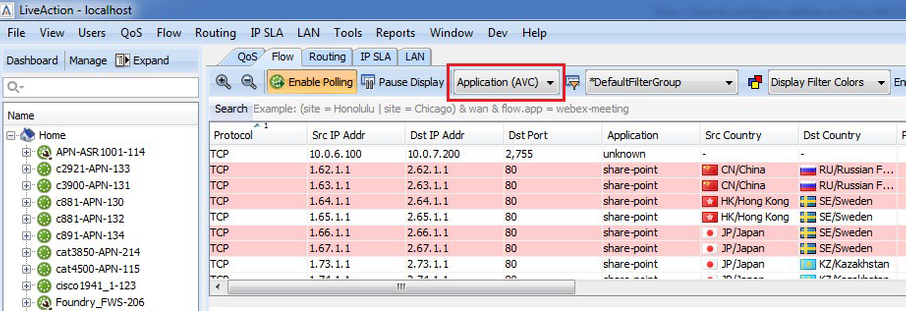
When completed you should be able to go into LiveNX, select your WLC 5500 and verify flows are coming in under the “AVC”.

If you have any questions about this guide, or just have LiveNX questions in general, please don’t hesitate to contact support@liveaction.com